Let's face it. In SharePoint 2010, creating ribbon custom actions was not a very pleasant experience. You had to know the inner workings of the XML and the black-magic behind selecting the right Id in the CommandUIDefinition. We had community tools like CKSDEV to help though. Now, I am happy to see that a new Ribbon Custom Action SharePoint Project Item slipped into Preview 2 of the Office Developer Tools. This new SPI provides a nice wizard interface to guide you through the process of creating an action. Let's take a look at it.
First, you'll need to create a new SharePoint App project. The downside of the tool is that it is only available for SharePoint apps. It's not in regular SharePoint 2013 projects. In my example today, I am going to attach a custom action to a list item to take the user back to the default.aspx application page. Of course, you can use traditional techniques as before to add JavaScript, pass parameters, and whatever else you need to do. I just want to show you what the wizard looks like today.
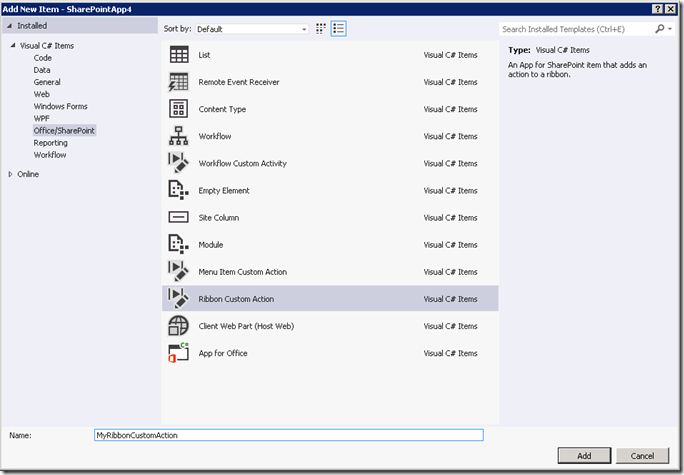
In the Add New Item menu, you'll see the new wizard here. Choose Ribbon Custom Action and give it a name.
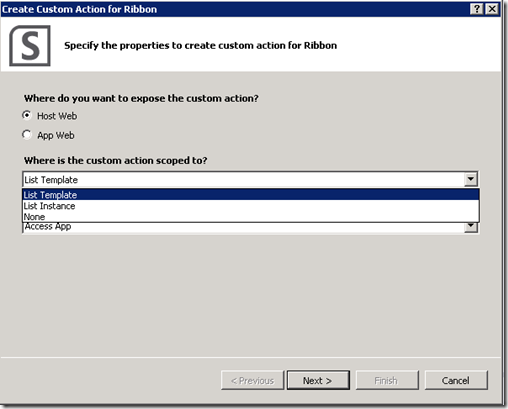
Note, that there is also a new Menu Item Custom Action template as well. When you click Add, you will be taken to the next step in the Wizard. Here you first need to choose whether you will apply this to the Host Web or the App Web. Remember that the App Web that has all of the pieces of your app and the Host Web is the site that hosts an instance of your app. One way you might use this new feature is that a user clicks on an item in the host web, uses the ribbon action and gets redirected to your app.
You have the ability to bind the custom action to a list template or a list instance. If Host Web is selected, selecting List Instance will provide you with a list of all instance on the particular host web that your app is currently configured to publish to. Otherwise, if you choose List Template, it will provide you a list of common templates. I don't think the Wizard will let you pick a custom template, so you would probably have to edit the XML manually when you are done.
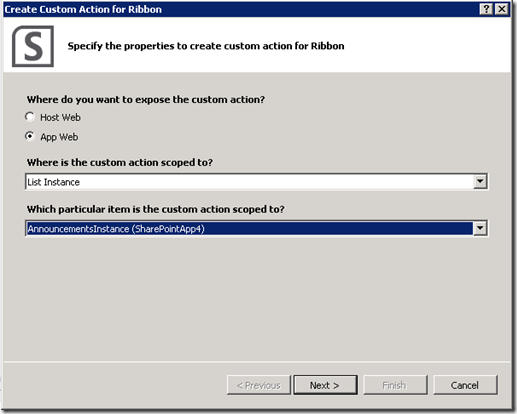
In my case, I have chosen App Web and then a specific List Instance. It knows to look through the List Instances you have in your project and put them in the list.
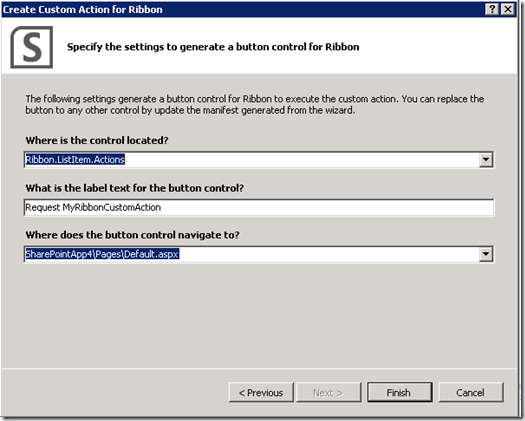
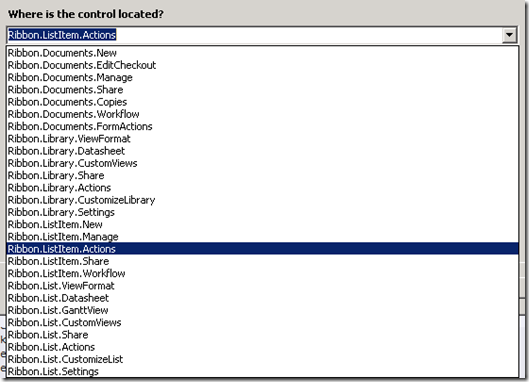
When you continue to the next step, it will allow you to specify the location of the ribbon, the text to display, and what page the user should be redirected to when clicking the link. You can select any existing ASP.NET page in the project for the action to navigate to. If you want to execute JavaScript instead, you would need to edit the XML once you complete the wizard.
It provides you with a list of locations that the control can be located at:
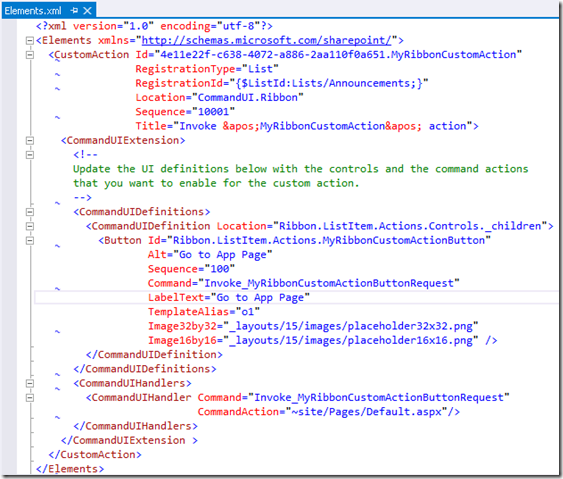
When you are finished, Visual Studio generates the XML that you need. You can make edits as necessary. However, at this point there is no going back to the Wizard and making changes. If you want the Wizard again, you'll have to delete the item and recreate it.
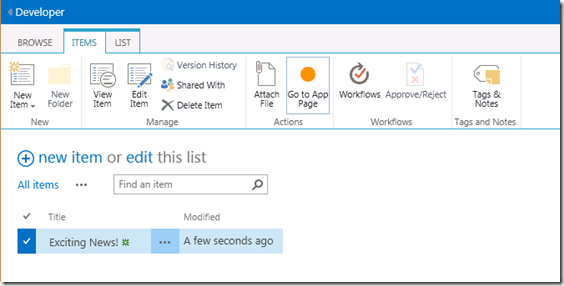
At this point we can run the project and go to the list that we set the action on. Selecting the list item, will expose the action in the ribbon.
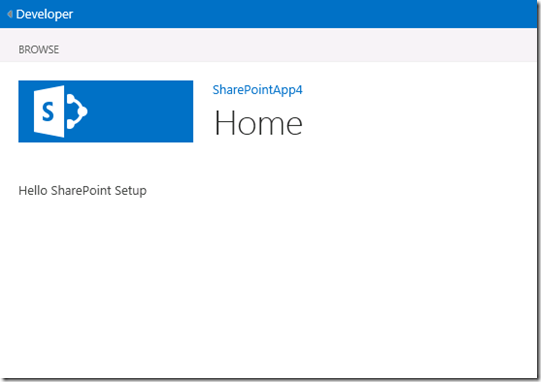
Clicking on the Ribbon Action, I then get redirected to my app home page.
I'm pretty excited about this feature since I have always struggled with creating custom actions. I think this will make it much easier to create actions now. This is important because this is one of the key ways to link between the host web and the app web. Unfortunately, this action is only present in Apps, but you could always cut and paste it into another project. You could also likely take the code it generates and use it in your SharePoint 2010 projects as well.
