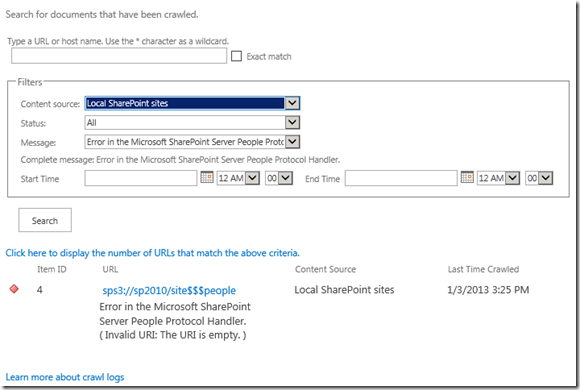
Error in the Microsoft SharePoint People Protocol Handler. (Invalid URI: The URI is empty.)
User Profile Synchronization Application
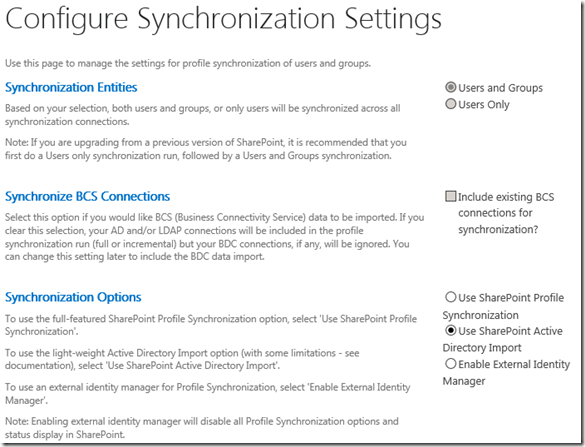
Let's start with configuring the User Profile Service Application. We need this to retrieve user profiles from Active Directory so that search can use them. If you already have your profiles imported, you can skip this section and proceed to My Sites. The nice thing about SharePoint 2013 is that you can set it up the easy way now with the new (well old from 2007) synchronization option called Use SharePoint Active Directory Import. You can still using the full sync if you want, but for those of you that don't want to mess with the pain you had with UPS in the past, give this a try. You can always change it later. If you already have profile synchronization working, there is no reason to mess with this setting. To get to this setting, go to your User Profile Service Application –> Synchronization Settings. Choose the option Use SharePoint Active Directory Import and click ok. You'll get a warning mentioning it's limitations after that.
Once you are done here, go to Configure Synchronization Connections and Create New Connection. Again, you don't need to do this if you already have synchronization up and running. Enter the name of your domain, provide an account that has credentials. This account does not need to be a domain admin (nor should it be). Click Populate Containers and select the OUs that you want to import and then save the connection. Back on the UPSA page, go to Start Profile Synchronization and select Start Full Synchronization and click OK.
My Sites
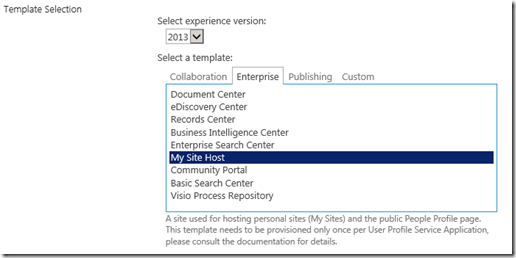
We now need to configure My Sites. Typically this is hosted on a new web application but it doesn't have to be. Now, you need to create a My Site Host. To do this, create a new site collection on the root path (/). Choose the My Site Host template and create the site collection.
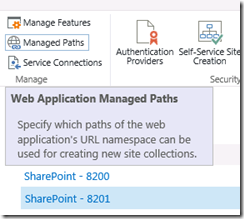
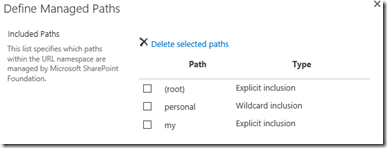
Once you have created this web application and set up it's site collection, you will need to create some managed paths for it. To do this, select the web application that host My Sites and click Managed Paths in the ribbon.
On this screen, remove the existing Sites managed path. Then add a wildcard inclusion for personal and a explicit inclusion for my.
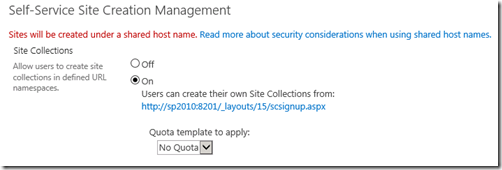
Now, we need to enable Self Service Site Creation. Return to the Web Applications page and click the Self-Service Site Creation. From here, select On and click Ok.
Search
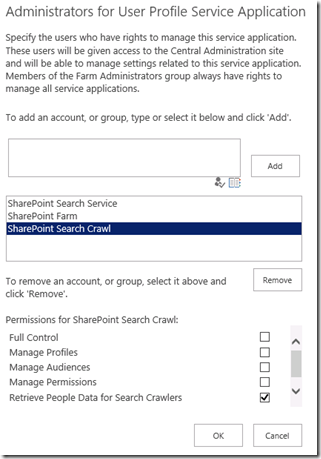
At this point, you may be good to go. However, there are a few settings that you should verify. First, go to the Service Applications page. Select your User Profile Service Application but do not click on the link. Instead click on the Administrators button. Typically, what you will find here is that when the Search Service Application was created, it adds the Search service account to this list. However, if you change the default content access account (as you should), it will not get updated here automatically. Therefore, you need to add your crawl account to this list and choose the Retrieve People Data for Search Crawlers permission.
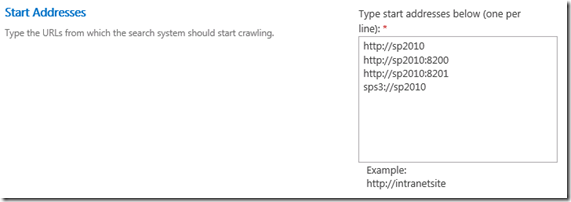
Now, we are probably ready to crawl, but it's worth checking the content source to be sure. Go to your Search Application –> Content Sources. Edit your default content source (typically Local SharePoint sites). Ensure that there is an entry with the sps3 protocol handler (i.e.: sps3://myserver) in the start addresses. You only need one sps3 entry and typically it is just the URL of the first web application you happened to create. It does not have to be the URL of the My Site Host.
Once you have confirmed these URLs are correct, you can start an incremental crawl. When it finishes, you can go to you will be able to go to your search center and search for people in your organization. If it doesn't work, return to your Search Service Application and view your crawl log. There usually is something there to help indicate what the problem is.
